


Tutorial on setting up SMTP on WordPress
There are many ways and plugins for SMTP, this time I will use the Easy WP SMTP plugin
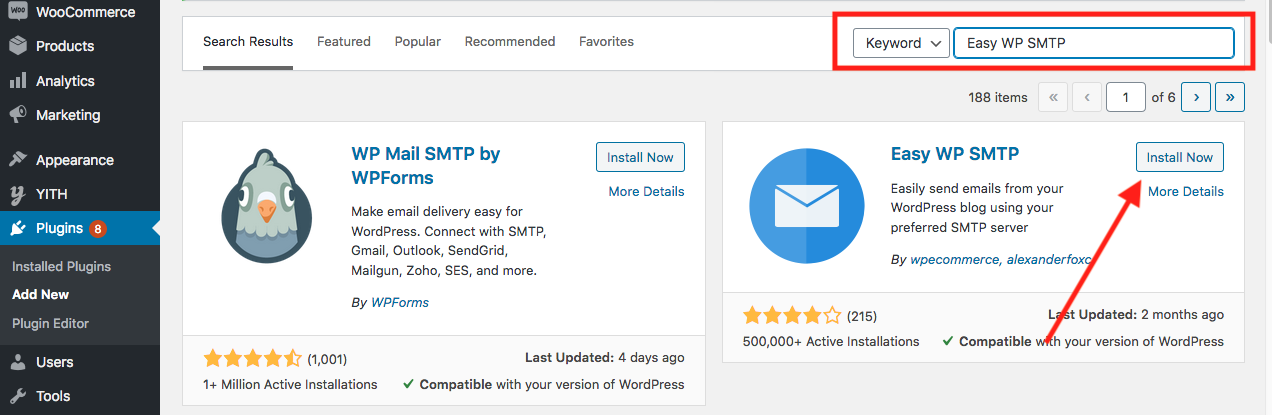
- Install Easy WP SMTP Plugin, go to Plugins> Add New, Type Easy WP SMTP in the search field, install and activate it
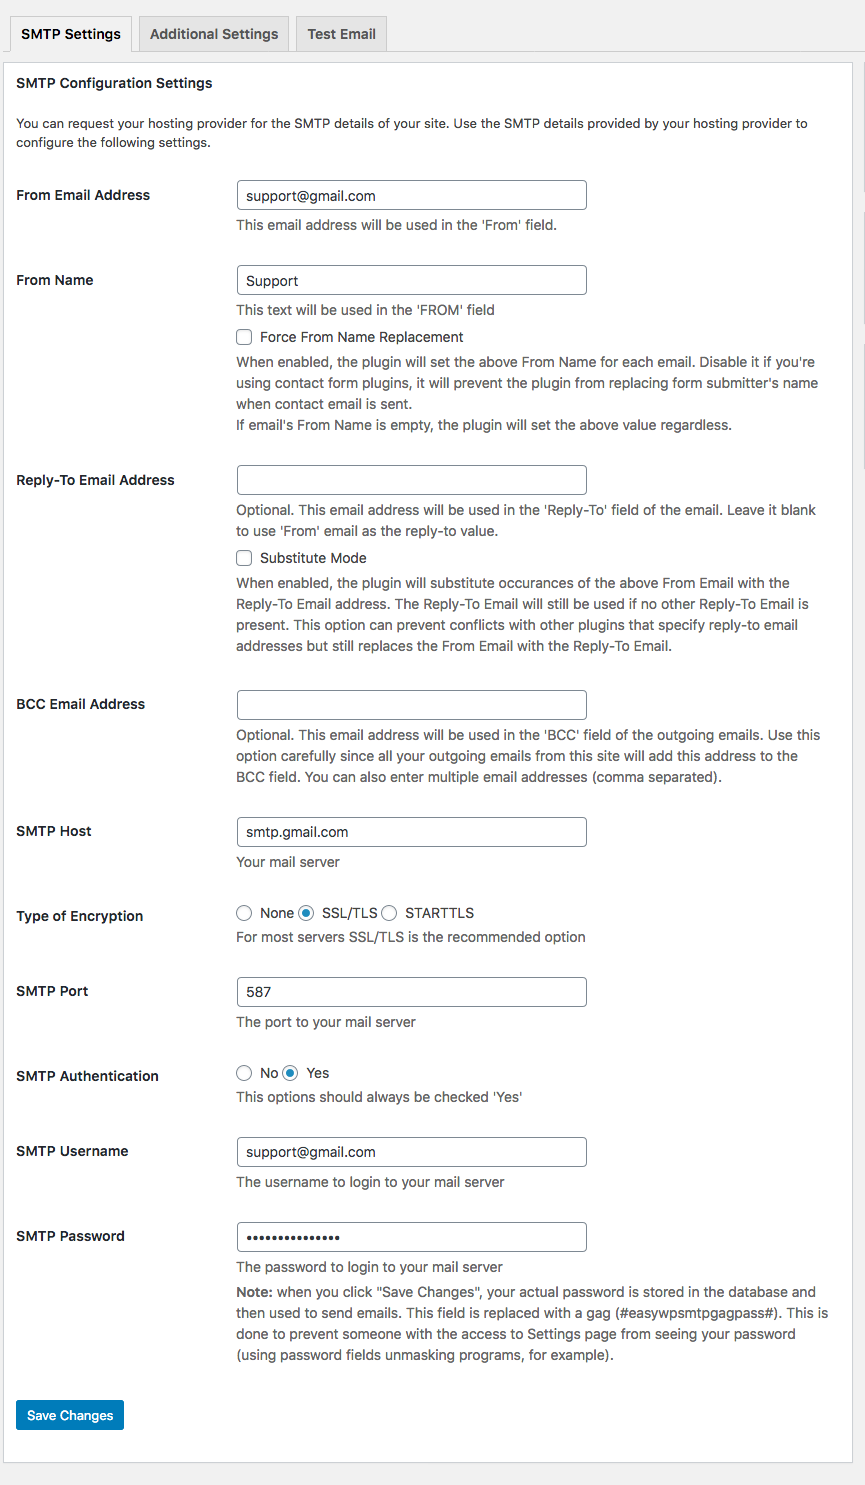
- Once activated, complete the settings in Settings> Easy WP SMTP
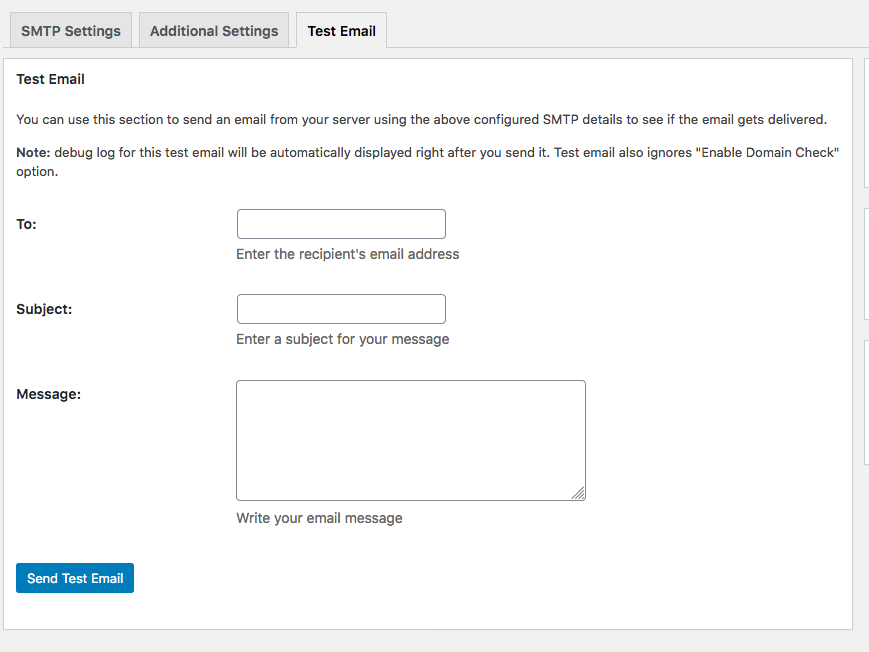
- To do a test email delivery can be in the tabs “Test Email”
Some Notes
SMTP Host
- For a Gmail account, the SMTP host uses smtp.gmail.com
- For a yahoo account, the SMTP host uses smtp.mail.yahoo.com
- For bing accounts, the SMTP host uses mail.namadomain.com
How to Send Emails Using Gmail SMTP Server
You can use your free Gmail account to send WordPress emails. However, for better delivery, we recommend using paid G Suite.
With G Suite, you get your own professional branded email address like (name@yoursite.com).
G Suite requires you to add MX records to your domain which means that your email will appear to be from your own domain name which increases authenticity and ensures better delivery.
Okay, the first thing you need to do is introduce and activate the WP Mail SMTP plugin.
WP Mail SMTP is the best WordPress SMTP plugin available. This allows you to easily use any SMTP worker to send WordPress messages with higher delivery capabilities.
We recommend you to buy a paid plugin called WP Mail SMTP Pro which gives you access to premium help, more mailers, and white gloves prepared by one of their specialists.
Once activated, you need to visit the Settings » WP Mail SMTP page to set the plugin settings.
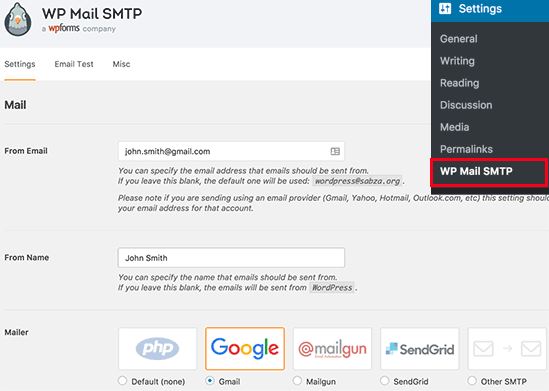
To get started, you need to make sure that you use your Gmail email address in the ‘From Email’ field. Then, you need to provide the sender’s name.
The WP Mail SMTP plugin offers two different ways to associate your WordPress site with Gmail workers.
The first step is using OAuth Authentication. This is a more secure method of sending messages using Gmail workers.
The next step is to physically enter Gmail’s SMTP settings. This technique is not recommended because it is not safe.
Therefore, we have to set up WordPress to use Gmail’s SMTP for sending messages.
Method 1: Setting Up Gmail to Send WordPress Emails using the OAuth Protocol
Way recommended for all clients. It’s safer and when you set it up, you don’t have to redo it.
You should start by selecting Gmail as your mailer and setting the return method to match the sender.
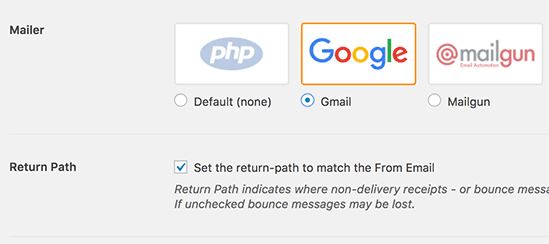
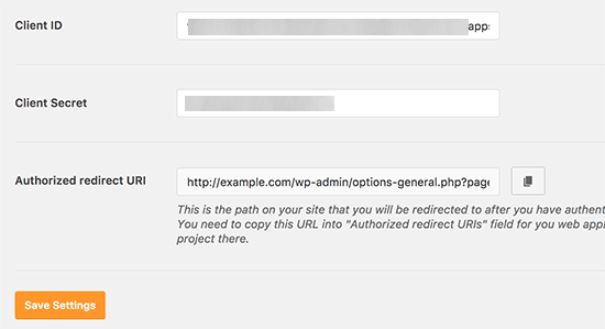
Then, you will see the fields to enter your Client ID, Client Secret, and a URL in the ‘Approved divert URI’ field.
We should set up these fields.
Creating an App and Generate API Keys for Gmail
Visit the Google Developers Console website and create a new project.
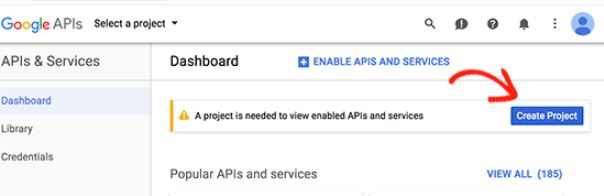
If you don’t see the button to create a project, you can try clicking the project drop-down option and create a new project.
Here you will be asked to provide a name for your project. Give it a name that is easy to remember, so you can easily fill it in at a later on.
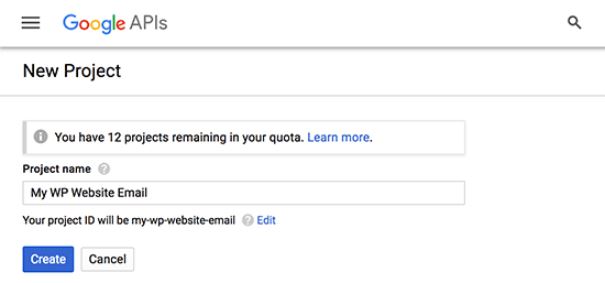
After that, click on the create button to continue.
Developer console will now create your project and take you to its dashboard. Google offer developers access to many of their APIs and services. You need to enable the APIs that you will be needing for this project.

Click on Enable APIs and services button to continue.
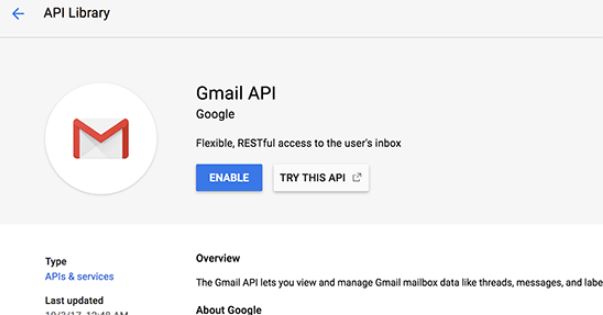
This will bring you to the APIs library page. Next, you need to type Gmail in the search box to quickly find the Gmail API and click to select it.
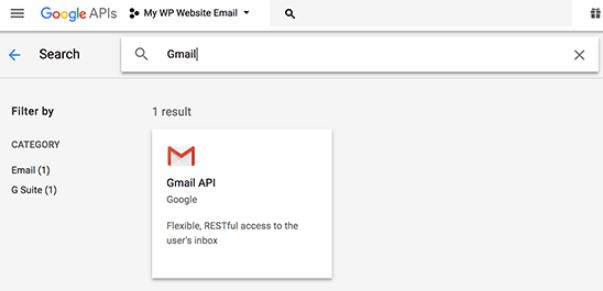
Now you’ll see an overview of the API and what it can do. Click the ‘Enable’ button to continue.
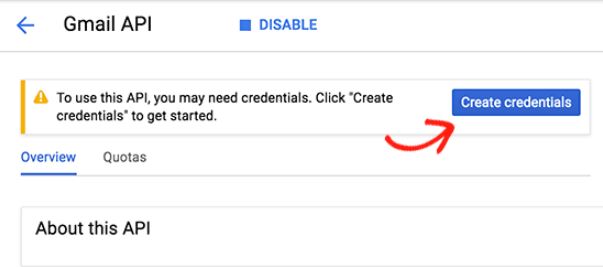
Once your API is enabled, the next step is to generate credentials that you can use in your WP Mail SMTP plugin settings.
Click the Create credentials button to continue.
On the next screen, you will need to select ‘Web browser JavaScript‘ in ‘Where you’ll be calling the API from’ field. After that click on the ‘User Data‘ option.
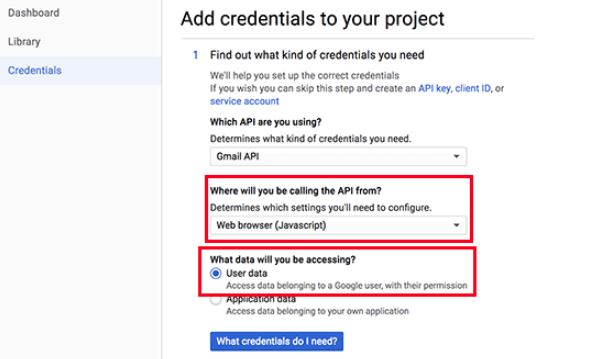
To continue, click on the ‘What credentials do I need?’ button.
You will now be asked to provide a name for your OAuth client name. You can enter ‘WP Mail SMTP’ here.
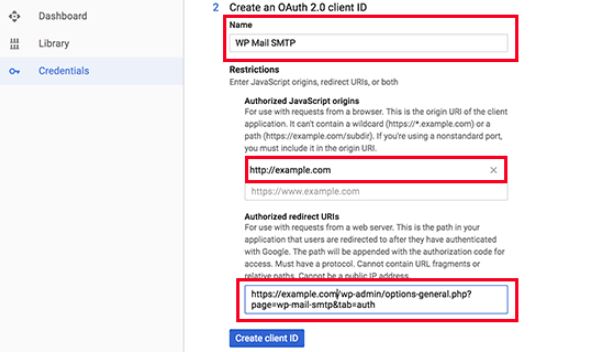
Bellow JavaScript origins field, you need to add your website’s domain name. Next, you need to copy and paste the authorized redirect URL from WP Mail SMTP plugin settings.
After that, click on the ‘Create client ID’ button to continue.
Next, you need to enter a name for OAuth consent screen. You can put the plugin’s name here.
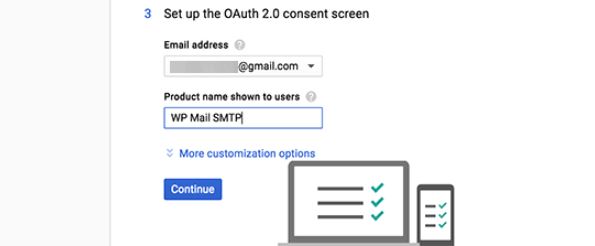
After entering the details, click on the continue button and the developer console will show your client ID. You can copy and paste this in the WP Mail SMTP plugin’s settings page. However, you will still need to add your client secret key.
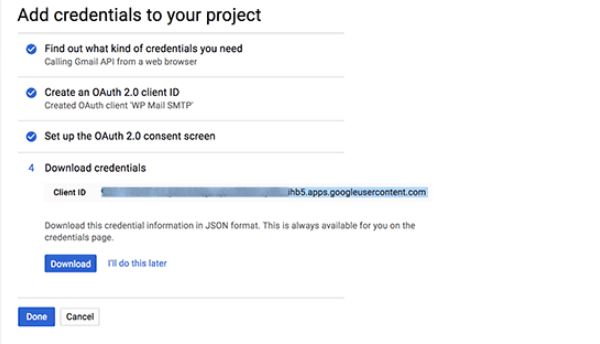
Go ahead and click the Done button to continue.
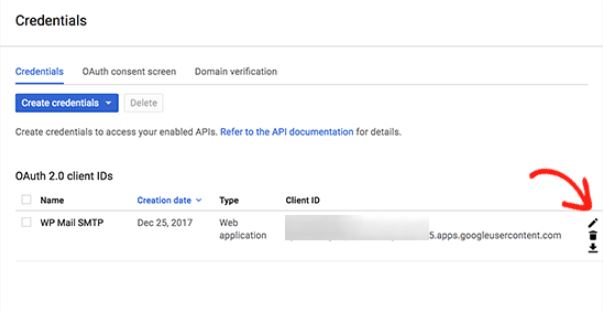
You will now be taken to your project’s credentials page. On this page, you can see your newly created credentials listed here. You need to click on the edit icon next to your credentials to continue.
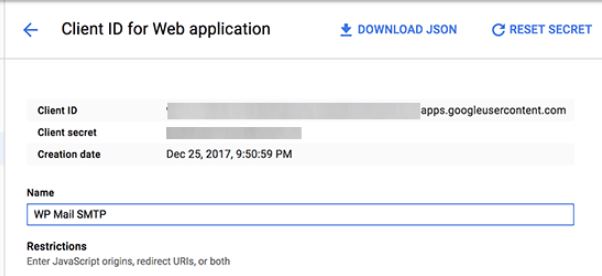
This will bring you to the edit credentials page where you will be able to see your client secret key. You need to copy and paste the key in your plugin’s settings page.
Return back to plugin’s settings page in your WordPress admin area. Now that you have both client ID and client secret keys, you need to click on the save settings button to continue.
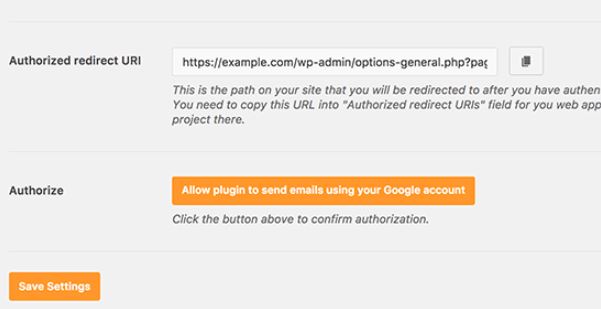
The plugin will now save your settings and reload the page. After that, you need to scroll down to the bottom of the settings page and click on the ‘Allow plugins to send emails using your Google account‘ button.
This step will take you to your account on Google, and you will be asked to give the website permission to send emails on your behalf.
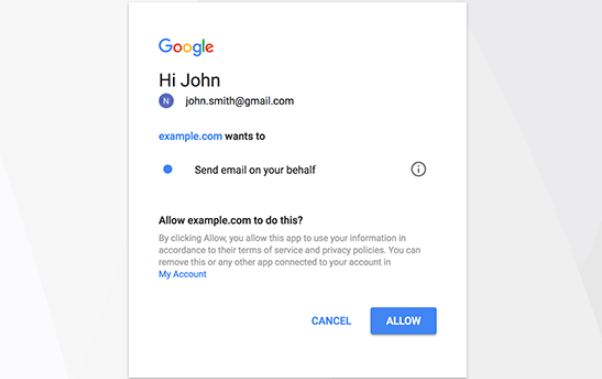
Click on the Allow button to give permissions.
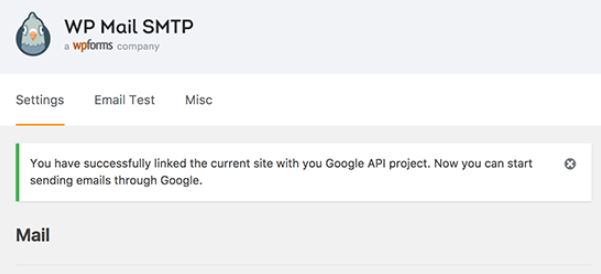
After that, you will be redirected back to your website where you will see a success message.
Method 2: Setting up Gmail SMTP as SMTP Sender
This method allows you to manually connect to Gmail’s SMTP servers to send your WordPress emails.
First, you need to visit Settings » WP Mail SMTP page to configure the plugin settings.
You need to start by providing the Gmail address you want to use in the ‘From Email’ field, and your name in the From ‘Name’ field.
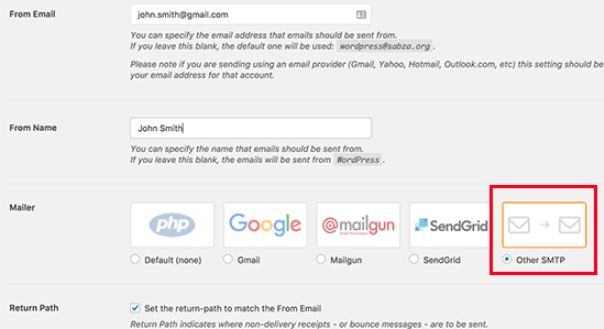
Next, you need to select ‘Other SMTP’ as your mailer and check the box next to return path.
After that, scroll down to the Other SMTP section to configure more settings.
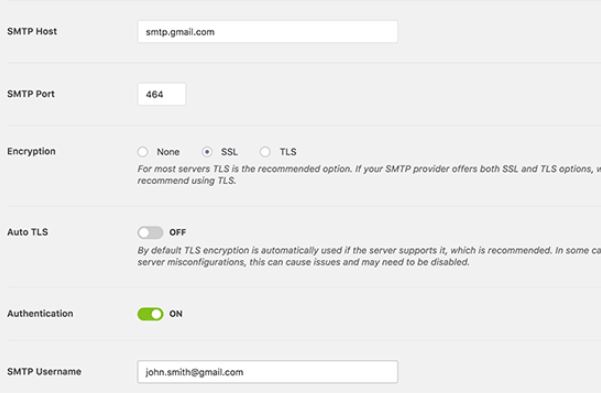
Here is the exact configuration you need to add in the plugin settings:
- SMTP Host: smtp.gmail.com
- SMTP Port: 465
- Encryption: Use SSL encryption
- Authentication: Turn on authentication
- Username: Your complete Gmail address, e.g. john.smith@yourdomain.com or john.smith@gmail.com
- Password: Password of your Gmail account
Once you are done, click on the save changes button to store your settings.
That’s all, you have successfully set up WP Mail SMTP to use Gmail SMTP servers.
Note: If you use method two, please know that it’s less secure because your password is stored in text. You can enhance this by using the constants tip, but we strongly recommend using Step 1.
Testing Your WP Mail SMTP Settings
WP Mail SMTP plugin allows you to test your email settings, so you can make sure that everything is working properly.
You need to visit Settings » WP Mail SMTP page and click on the ‘Email Test’ tab. Simply provide an email address that you can access in the send to field and click on the send email button.

You will see a success message. You can now check your inbox to see a message with the subject line ‘WP Mail SMTP: Test Email to…’.
That’s all, you have successfully set up your WordPress site to send emails using Gmail SMTP servers.
Get More With WP Mail SMTP Pro
If you want even more functionality, you should try WP Mail SMTP Pro.
With the Pro version of the plugin, you can connect with:
- G Suite/Gmail
- Amazon SES
- Mailgun
- Office 365 / Outlook.com
- SendGrid
- And more
You also get additional features like email logs, the ability to fine-tune/control which notification your WordPress site sends, and more.
Troubleshooting Gmail SMTP Not Working Issues
We have seen users encounter few issues when using Gmail SMTP with certain shared hosting configurations.
Take the following steps to fix the Gmail SMTP issue:
- Log in to your cPanel account and create an email account that matches your Google apps email address. This might seem strange because you’re not using your server for emails. This step basically tricks your server into believing that you’re sending the email through the server.
- In your cPanel account, go to the MX Records and change the MX routing from automatic to remote. It might be a little tricky to find since each host now has a custom cPanel interface. You need to look for a small link next to MX that says Email Routing: Remote Mail Exchanger.
- After that log back into your WordPress site and send a test email.
We hope this article helped you learn how to send email in WordPress using Gmail’s SMTP server. You may also want to check out our other our blog articles.
If you like this article, please like and share this article with your friends. thank you 🙂