


Complete Guide: How to Use Caesium Image Compressor
In the SEO world, it’s important to have small-sized images with decent quality rather than large-sized images with super high quality. The reason is large-sized images will take up all your storage and slow down your website speed. So, the next thing you need to do is compress your images to smaller sizes.
You can compress your images easily without losing quality with Caesium Image Compressor.
In this post, we will give you a comprehensive explanation of “How to Use Caesium Image Compressor”.
Getting Started
Caesium Image Compressor is a free image compression application that allows you to compress your pictures up to 90% without visible quality loss. This tool is suitable for photographers, bloggers, webmasters, businesses, and casual users that seek high flexibility image compression.

You can do almost everything with Caesium, starting from ordinary image compression, lossless compression, batch compression, image resizing, and format changing in one tool. Moreover, it supports all types of images starting from JPEG, PNG, GIF, BMP, and WMF.
Before getting to the main topic, you can read our full review about Caesium Image Compressor.
User Interface of Caesium Image Compressor
Just to let you know, Caesium provides its service in two formats; a desktop app that works fully offline and an online app on its website. The official Caesium desktop app is available for Windows and Mac. On the other hand, you can use the online compression app by accessing the Caesium website.
Read also: Revealing 7 Exceptional Things That Caesium Image Compressor Does
Caesium Image Compressor for Windows
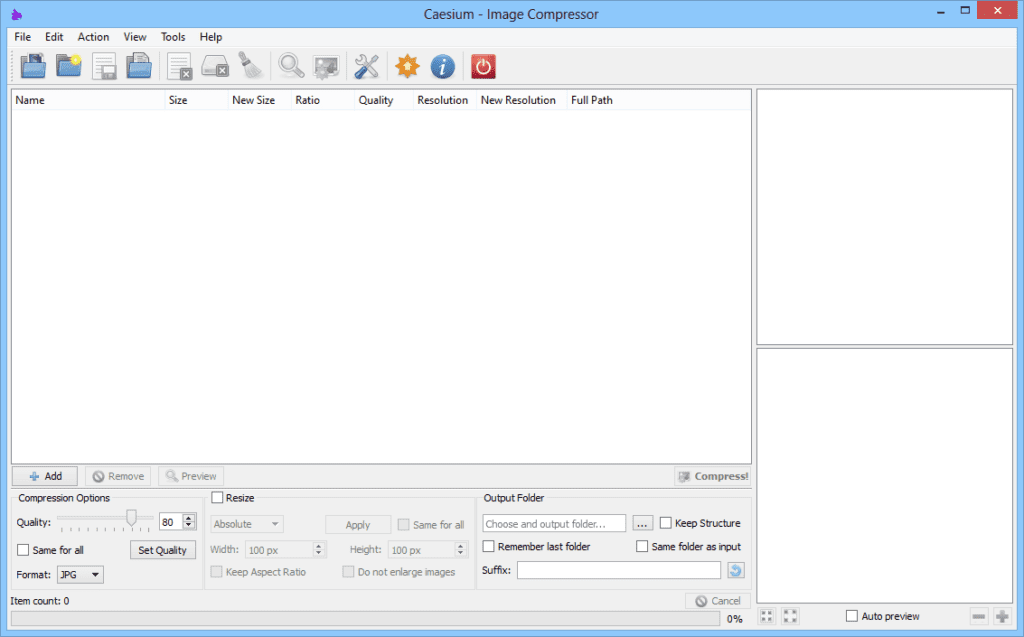
With the Caesium app on the desktop, you are able to compress, resize, and change the format of your image. The taskbar at the top contains File tab to add pictures or a folder containing the images you want to compress. You can choose several pictures for batch compression.
The middle window will show you image files information along with the original size and the compressed size. Whereas, the right window will show the image preview before and after compression.
All settings for image compression, resizing, and output folder are at the bottom of the window.
Online Image Compressor in Caesium Official Website
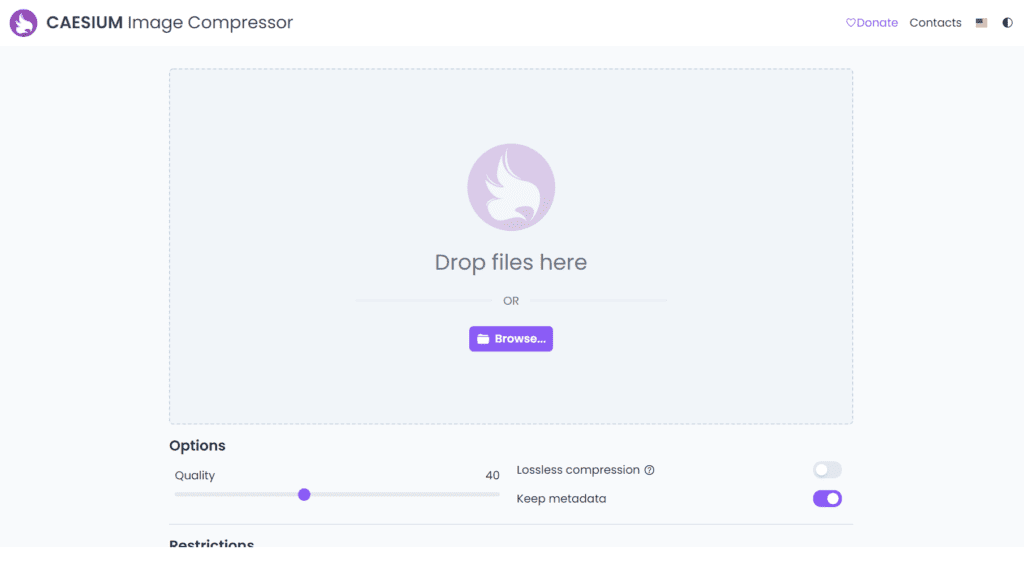
The Caesium Online Image Compressor can be accessed through the official Caesium website. Unlike the Caesium app for desktop, you can only compress images while setting the compression level. There is also an option for lossless compression.
How to Use Caesium Image Compressor?
Before proceeding further, you should install the Caesium application. We have posted the complete installation steps here: 5 Simple Steps to Install Caesium Image Compressor for Windows, Mac, and Linux.
Select Image Files
After opening the Caesium app, you can start by selecting the image files that you want to compress.
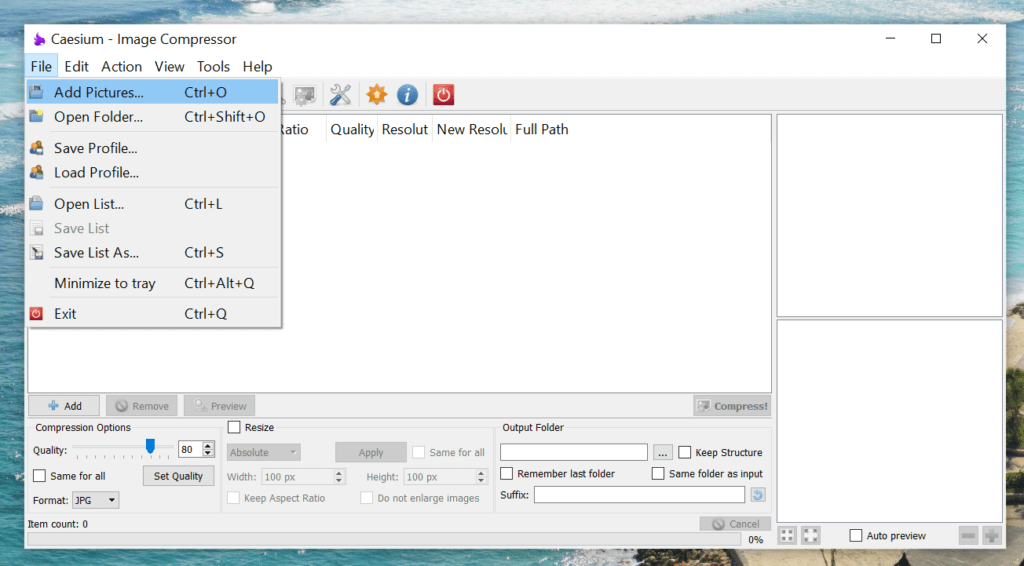
- Click the File tab at the top left of your window.
- Choose Add Pictures or click Ctrl + O directly.
- Select the image file you want to compress or choose several pictures at once for Batch Compression.
- Click enter
You can choose image files with JPEG, PNG, GIF, BMP, or WMF formats.
Set the Quality Compression
Now, you can choose the amount of compression level for your images.
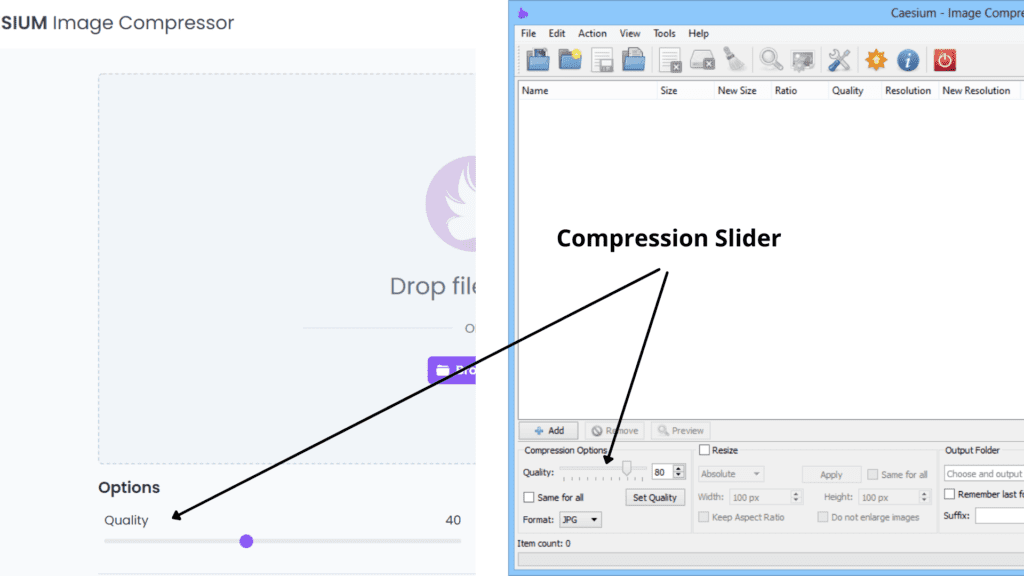
- Slide the Compression Slider at the bottom left of your window. There is a range of 0-100 in the slider. This will affect the quality outcome of your images.
- If you do batch compression or compress many images at once, tick on Same for all box.
- Select the image format. There are 4 format choices: JPG, PNG, BMP, or same as the image input.
- Click the Set Quality.
You can use the format feature to change your original image format.
Set the Image Sizes
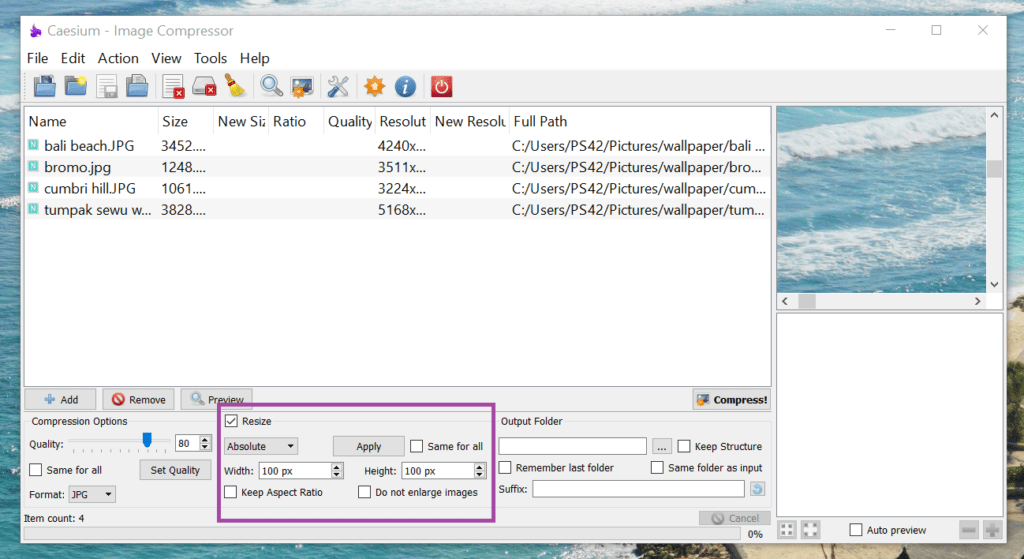
Aside from compressing images, you also can resize your images with Caesium.
- Tick on Resize.
- If you want to resize several images at once, also tick on Same for all box.
- Adjust the image width and height. If you want to resize based on the pixel, use the absolute setting. On the contrary, if you want to resize based on the percentage, use the percentage setting.
- Click on the Keep Aspect Ratio if you want to get the same ratio as your initial images.
- Choose the Do not enlarge images to avoid your images getting cropped when you change the width and height.
Set Output Files
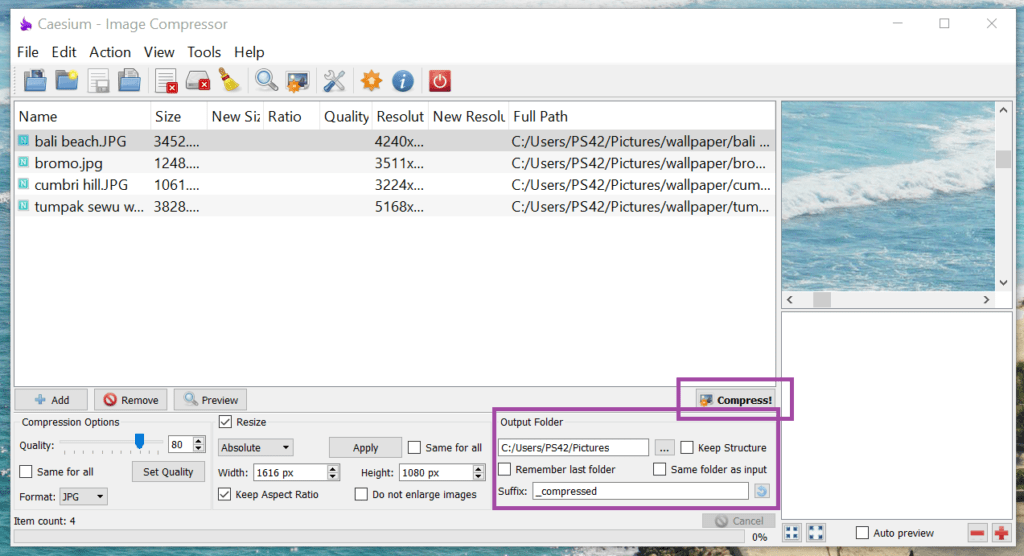
Next, determine the storage location for the result of compression at the bottom right of your window.
- Directly choose a folder in your storage room or use the same folder as input.
- Optionally, you can add a suffix at the end of the compressed image file’s name. This can help you to differentiate the compressed image from the original one.
- Finally, click the Compress! button.
Image Compression Result
After clicking on the Compress button, Caesium will automatically compress your image. The process doesn’t take long. In addition to that, you will get the information of the original size of your image and the new size after compression inside the app.
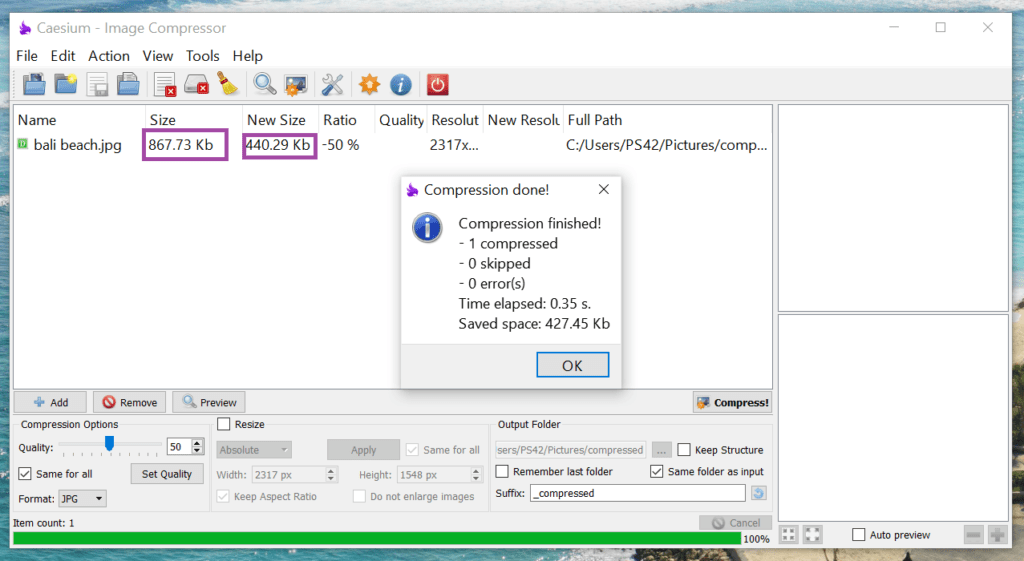
I try to compress an image of Bali Beach with the original size of 867 Kb. Then after compressing it with 50% quality using Caesium Image Compressor, it has a final size of 440 Kb.
Conclusion
Caesium Image Compressor is a straightforward tool perfect for compressing, resizing, and changing formats for pictures from different types of files. It allows you to set the compression quality while seeing the result sizes. You can use Caesium by downloading the Caesium desktop app or use the online compression tool on its website.
References